Sensor Install Guide
Importance of Sensor Positioning
The positioning of sensors is crucial as it directly influences their effectiveness in identifying specific types of failures. Additionally, the reliability of anomaly detection is highly dependent on the quality of data collected, which is, in turn, a function of where the sensor is placed.
Recommendations for Placement
Optimal sensor placement is determined by:
- Proximity to vibration source (closer is preferable)
- Mounting on a rigid surface (for minimal signal loss)
- Space availability for installation.
Examples
Example 1 - Primary, secondary, tertiary
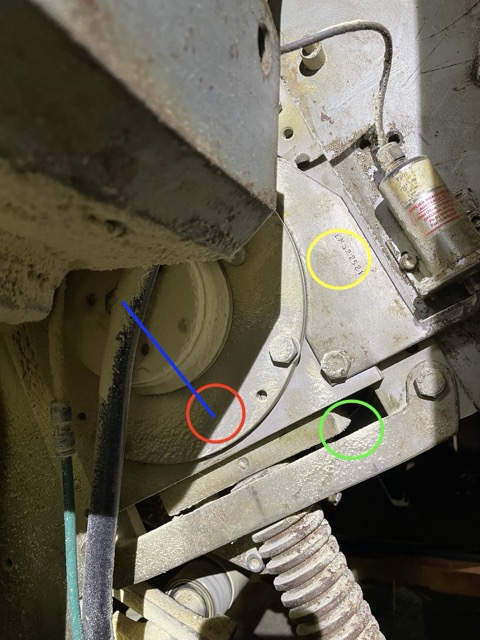
The blue line shows the distance to the vibration source. The following image of a roller bearing with the primary (red), secondary (yellow) and tertiary (green) locations marked.
Example 2 - Multiple sensors, to detect different failures
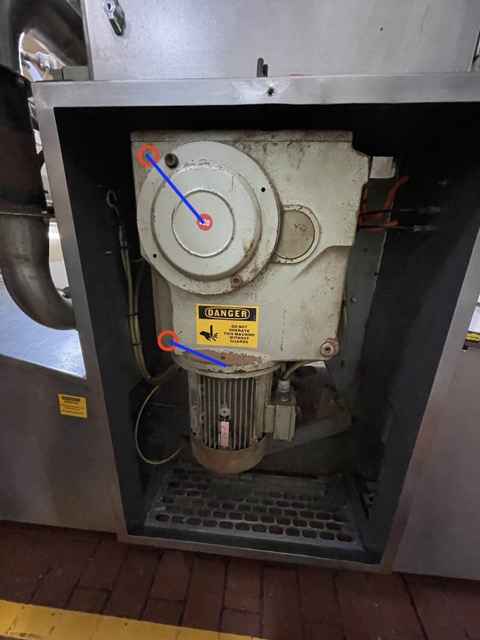
Sensors installed to detect the gearbox and motor failures.
Example 3 - Multiple sensors, to detect different failures
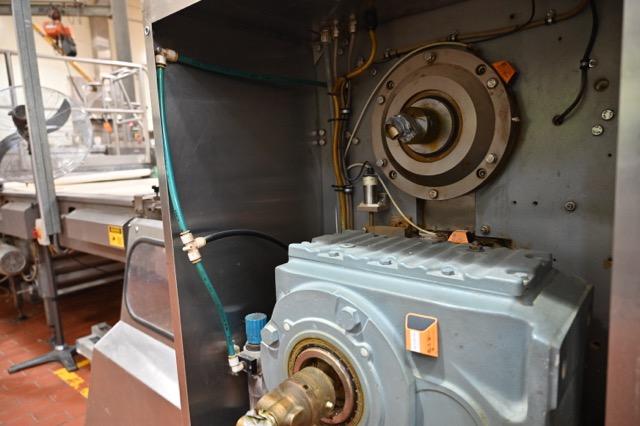
Sensors installed on the bearings and gearbox
Example 4 - When space is limited
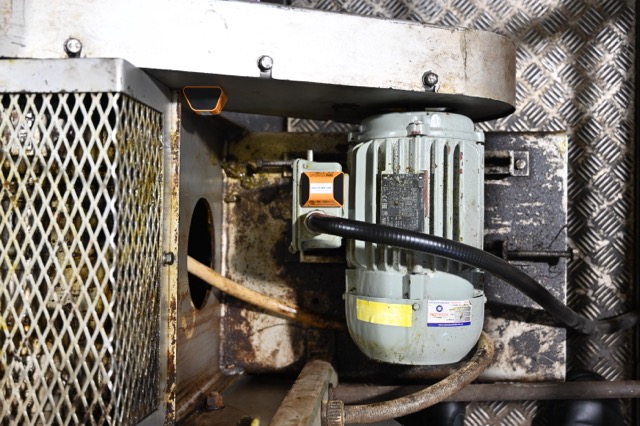
In some cases, space constraints prevent ideal sensor placement on machines like the small motor and fan shown here. This can result in less accurate alerts from these sensors.
Adhesive
We recommend using Loctite products matched to the surface and to surface or operating temperature at the mount point:
- Flat surfaces: Loctite 454
- Slightly curved surfaces: Loctite 3090
- 60–100°C: Loctite 4070 — excellent in this range (including curved or high-temperature installs within it)
- Exceeding 100°C: Loctite HY 4090 — best suited for high-temperature installs; follow Henkel dual-cartridge mixing and application instructions (differs from single-part adhesives in the video below)
The install video demonstrates single-part adhesives (e.g. 454, 3090, 4070). HY 4090 is a two-part product: use the supplied mixer nozzle and manufacturer directions.
Installation Steps
-
Clean surface using isopropyl wipes
-
Dry and remove lint using the microfibre cloth
tipIf you are mounting multiple sensors close to each other, clean all the areas first. So you can maximise the number of sensors you apply adhesive to, before the tip dries out.
-
Verify mounting position will work (place sensor in location without adhesive)
- Is there enough space?
- Is there enough contact between sensor and machine? particularly for curved surfaces
- Check the orientation of the sensor - x,y,z (marked on the sensor itself)
-
Apply the selected Loctite (per Adhesive above) sparingly on the underside of the sensor, avoiding the metal circle in the middle (temperature sensor)—see video for single-part products; use manufacturer instructions for HY 4090.
-
Affix sensor to the surface, holding the sensor for 15-30 seconds (depending on whether the surface is curved)
-
Factory AI will verify whether the sensor can connect to the gateway